LED Grow Light Dimming: How to Use a Dimmer at Each Growth Stage
A dimmer is the cheapest control a grow light can have, and the easiest to misuse. Dimming changes how many photons reach the canopy, but it does not change the shape of the spectrum, the photoperiod or the area the fixture covers — and those four quantities together decide what the crop actually receives. This guide sets out what a dimmer physically changes, the four dimming interfaces used on horticultural drivers, and a worked method for setting intensity stage by stage.
- What a dimmer actually changes
- The four dimming interfaces you will meet
- Why dim at all: matching delivered light to the growth stage
- Setting intensity stage by stage: a worked example
- Dimming, or raising the fixture?
- Five mistakes that waste a dimmable fixture
- Frequently asked questions
- About the publisher
- References
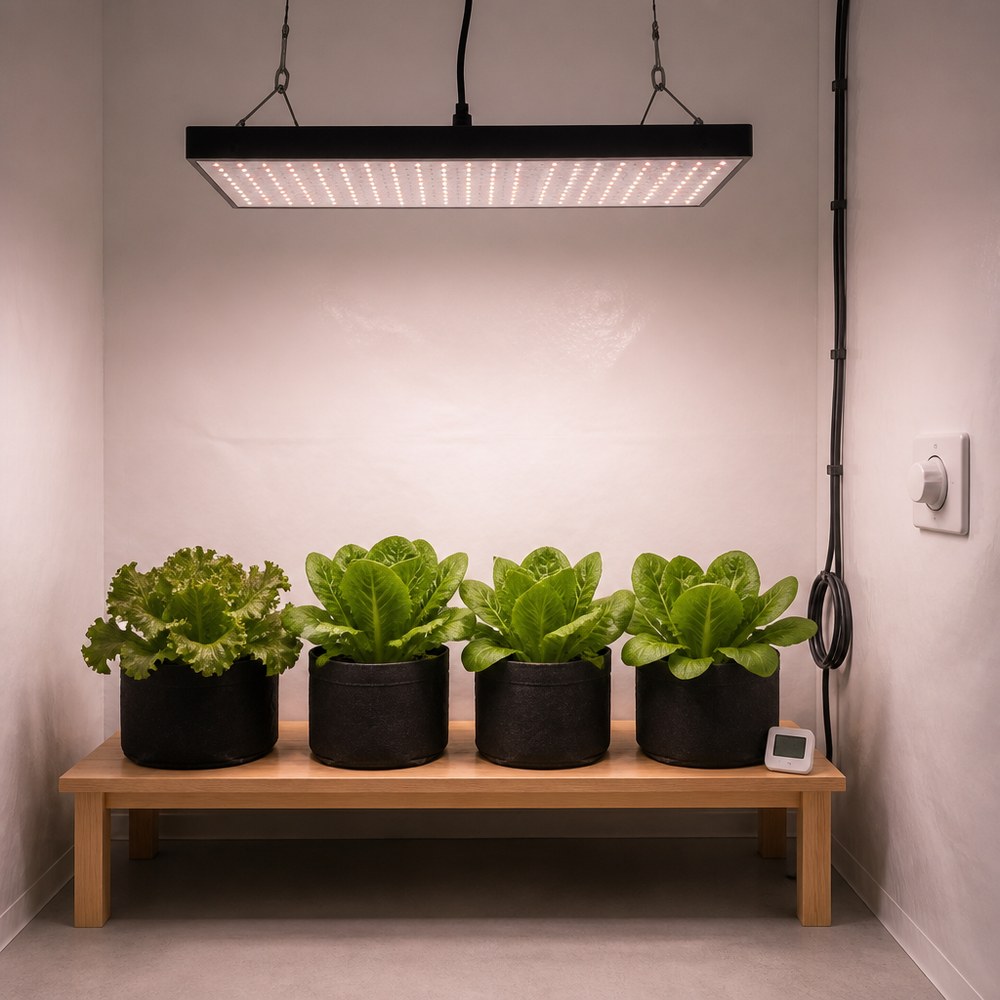
What a dimmer actually changes
Dimming works by reducing the drive current that the LED driver pushes through the light-emitting diodes. Output falls with current, so a fixture set to roughly half its maximum drive current emits roughly half as many photons per second. The relative spectral power distribution moves only slightly, because the same diodes are still emitting — they are simply being driven less hard. In practice this means:
- Intensity changes. PPF (micromoles per second from the fixture) and the resulting PPFD at the canopy (micromoles per square metre per second) both fall.
- Spectrum barely changes. A fixture dimmed to 50 % does not become "more red" or "less blue" in any way that matters for planning. Spectrum is a purchasing decision, not an operating one.
- Photoperiod does not change. The hours of light per day stay where your timer put them.
- Footprint does not change. Dimming a wide fixture gives dimmer light over the same area; it does not make the area smaller.
Those four quantities combine into one number that describes what the crop receives: the daily light integral, or DLI.
Because DLI is a product, dimming and shortening the photoperiod are not interchangeable. Halving intensity and halving the hours both halve the DLI, but they do so with different consequences: a shorter photoperiod changes the plant's developmental signalling, while a lower intensity does not. When the goal is to slow growth or save electricity without touching day length, dimming is the lever that only moves the light quantity.
The four dimming interfaces you will meet
Almost every horticultural LED driver offers at least one dimming method, and many offer several on the same unit. The differences that matter in practice are the control signal, how finely output can be set, and whether the driver can be taken all the way to off.
| Interface | Control signal | Usual dim range | Setting granularity | Extra wiring | Where it is used |
|---|---|---|---|---|---|
| 0–10 V analogue | DC voltage, typically 1–10 V for 10–100 % (0 V on dim-to-off models) | 10–100 %, or 0–100 % with dim-to-off | Continuous within the range | Two low-voltage control conductors | The default on most horticultural drivers; wall dimmers and control panels |
| 10 V PWM (duty cycle) | Fixed-amplitude pulse train; output follows the duty cycle | 0–100 % | Finely variable, set by the controller's duty-cycle resolution | Two low-voltage control conductors | Controller-driven research and adaptive duty-cycle schemes, where output must be changed quickly and precisely |
| Resistive (potentiometer) | Variable resistance across the dim terminals | 0–100 % on most drivers | Continuous | None — a knob on the fixture or on a wall plate | Single-fixture setups and simple manual adjustment |
| Digital bus (e.g. DALI, serial/UART) | Addressed digital command from a controller | Down to very low levels; DALI specifies dimming to 0.1 % | Quantised but very fine | Data cable and a controller | Multi-fixture rooms, scheduled ramping, data logging |
The practical consequence of Table 1 is that the interface decides how repeatable your settings are. A potentiometer has no scale, so "70 %" is a judgement call made by eye; a controller writing a duty cycle reproduces the same output every time. If you intend to run identical zones, the digital and PWM routes repay their wiring cost; if you are running one fixture over one bench, a knob is enough.
Why dim at all: matching delivered light to the growth stage
Two forces push in opposite directions. A young plant with a small leaf area cannot use, and can be damaged by, the light a mature fruiting canopy will thrive on. And electricity is usually the largest running cost of an indoor grow, so any photon that the canopy cannot use is paid for twice — once at the meter and once in the heat it leaves in the room.
The size of the effect is not marginal. In a controlled comparison of daily light integral during plug production, stems and leaves of seed impatiens grown at a DLI of 14 mol m-2 d-1 contained 47 % more plant tissue than plants grown at 4 mol m-2 d-1 in the same facility — a difference produced purely by how much light was delivered per day (Michigan State University Extension). A dimmable fixture can cover that whole range with one piece of hardware.
The reason dimming is the right lever for this job, rather than switching fixtures or changing the timer, is that it moves intensity alone. The same published work in the peer-reviewed literature on controlled-environment lighting notes that automated duty-cycle dimming is "simple and low cost" and "can increase the cost effectiveness of supplemental lighting", precisely because it matches delivered photons to what the crop can use at that moment. Studies on dimmable fixtures in microgreen production make the same point from the energy side: with a dimming option available, power consumption can be lowered by reducing the intensity delivered to the crop.
Setting intensity stage by stage: a worked example
The method is arithmetic, not guesswork. Take a single fixture with a published output of 800 µmol s-1 lighting a 1.2 m × 1.2 m canopy (1.44 m2), with the timer set to 16 h. Average PPFD over that area is the fixture output divided by the area; the DLI is then that PPFD multiplied by the photoperiod.
| Dim setting | Fixture output (µmol s-1) | Average PPFD (µmol m-2 s-1) | DLI at 16 h (mol m-2 d-1) | Share of the full-output design point |
|---|---|---|---|---|
| 100 % | 800 | 556 | 32.0 | 100 % |
| 80 % | 640 | 444 | 25.6 | 80 % |
| 60 % | 480 | 333 | 19.2 | 60 % |
| 40 % | 320 | 222 | 12.8 | 40 % |
| 20 % | 160 | 111 | 6.4 | 20 % |
Read the table backwards to set a stage. If the plan for the first two weeks after transplanting is a DLI around 12.8 mol m-2 d-1 on a 16-hour photoperiod, the dimmer goes to 40 % and stays there. When the canopy closes and demand rises, step up to 60 %, then 80 %. The crop-specific DLI targets themselves should come from the extension or breeder guidance for that species; the table only converts a target into a knob position for this particular fixture.
Dimming, or raising the fixture?
Both reduce PPFD at the canopy, and the choice between them is not arbitrary:
- Dimming keeps the illuminated area and the light distribution where they were; the whole illuminated footprint gets proportionally less light. It also lowers the electrical input, and it reduces the heat the fixture rejects into the room.
- Raising the fixture keeps the fixture at full output but spreads it over a larger, softer-edged area. Intensity at any one point falls, but the edges of the canopy lose more than the centre, and a larger share of the emitted light now lands on walls, floor or the film of the grow tent instead of on leaves.
As a rule of thumb: use the dimmer when you want less light on the same footprint, and use height when you want a different footprint. If your only reason for raising the fixture is to reduce intensity, the dimmer usually does it with less waste — and it leaves the thermal and optical design at the point the manufacturer tested.
Five mistakes that waste a dimmable fixture
- Expecting the spectrum to change. Planning a flowering recipe around a "redder" dim setting is planning around something that does not happen. Choose spectrum at purchase time.
- Dimming below the driver's stated minimum. Many drivers specify a minimum dim level; below it output can become unstable, flicker or drop out entirely. The datasheet's minimum is a limit, not a suggestion.
- Choosing a PWM frequency that is visible. Duty-cycle dimming switches the array on and off. At a low switching frequency the flicker becomes visible in video and photographs, and on some drivers audible. Use a frequency well above what camera and eye resolve; the adaptive duty-cycle work in the literature relies on switching that the plants and the recorders integrate over.
- Wiring several drivers to one dimmer beyond its rating. Dimming circuits are not power circuits — a single control output is only rated for a limited number of driver inputs. Check the control-side rating before daisy-chaining a room.
- Assuming dimming replaces a light meter. A knob position is not a measurement. Without one PPFD reading per stage you have no way to know whether the delivered DLI matches the plan.
Frequently asked questions
Can I dim an LED grow light all the way down to 10 % for seedlings?
Some drivers can, some cannot. Check the driver's specified minimum dim level first: many units are happy across the full 0–100 % range, but others become unstable or switch off below a stated threshold. If 10 % of your fixture still delivers far more light than a seedling needs, dimming alone will not get you there — combine it with a shorter photoperiod, or use a smaller fixture over the propagation area.
Does dimming change the colour of the light?
Only slightly. The same diodes keep emitting; they are simply driven at a lower current, so the relative spectral power distribution moves a little but stays recognisably the same mix. The visible change most growers notice is that dimmed light looks duller to the eye, which is a property of human vision at low light levels, not of the spectrum reaching the plants.
Will running the fixture dimmed make it last longer?
Running at reduced drive current generally lowers the LED junction temperature, and lower temperature slows lumen depreciation — the mechanism behind the L70 figures published for LED products. How much of that benefit you actually get depends on the driver's part-load efficiency and the fixture's thermal design, so treat it as a secondary benefit rather than the reason to dim.
Can I use an ordinary household dimmer switch?
Not safely. A household dimmer is built to control mains voltage to a lamp, while a horticultural driver expects a low-voltage control signal on separate dim terminals (0–10 V, PWM or resistance, depending on the model). Connecting the mains-side switch to the driver's dim terminals, or the control signal to the mains, can destroy the driver. Use the interface the datasheet specifies, and use a dimmer rated for it.
About the publisher
XineLam is a grow-light manufacturer in Zhongshan, China, with 17 years of experience in LED lighting and 300+ patents in China and internationally. The company designs and builds full-spectrum LED grow lights, LED drivers and horticultural light bars for indoor farms, grow tents and greenhouses.
References
- Michigan State University Extension. Benefits of Lighted Plugs. Discusses the effect of daily light integral during plug production, including the comparison of seed impatiens grown at 14 and 4 mol m-2 d-1. https://www.canr.msu.edu/uploads/resources/pdfs/benefitsoflightedplugs.pdf (accessed 29 September 2026).
- HortScience 52(1):72. An Adaptive Control Approach for Light-emitting Diode Lights. Peer-reviewed study of automated duty cycle control of LED grow lights. https://journals.ashs.org/downloadpdf/view/journals/hortsci/52/1/article-p72.pdf (accessed 29 September 2026).
- U.S. Department of Energy, Solid-State Lighting Program and USDA Agricultural Research Service. Horticultural Lighting R&D meeting. Notes that LED lighting can be engineered to provide tailored spectral power distribution, tailored optical distribution and precise intensity control. https://www.energy.gov/eere/ssl/articles/solid-state-lighting-program-usda-ars-horticultural-lighting-rd-meeting (accessed 29 September 2026).
- Agronomy 11(3):537. Differential Effects of Low Light Intensity on Broccoli Microgreens. States that with a dimming option available for LED fixtures, power consumption can be lowered by decreasing the light intensity provided to the crop. https://www.mdpi.com/2073-4395/11/3/537 (accessed 29 September 2026).
- Inventronics. SUM-330SxxxHF series datasheet. Example of a horticultural LED driver offering isolated 0–10 V, 10 V PWM and resistor dimming with dim-to-off on the same unit. https://www.inventronicsglobal.com/am/wp-content/uploads/2022/05/DS-SUM-330SxxxHF_Rev.B.pdf (accessed 29 September 2026).
Scope note: this guide explains how dimming works and how to convert a target daily light integral into a dim setting. It does not recommend a specific product, and the worked example uses illustrative fixture and area figures. Confirm the efficacy, minimum dim level and dim-to-off behaviour of any fixture against the test data supplied with it before purchase.